This article will explore the Notion API, mainly getting an API key and querying a database.
For this article, we shall work with a request testing tool.
This is a series on building a Node powered Notion API:
- Part 1: Getting started with the Notion API You are here 💖
- Part 2. Configure Tailwind JIT for a node express app
- Part 3: Node express query Notion database
- Part 4: Node express showing Notion results in the front end
- Part 5: Updating a Notion page through a node website
- Part 6: Creating a Notion page through a Node express app
What is Notion
Notion is a component-based note-taking app. It offers databases, calendars, files, and much more.
I use Notion as the primary source for my blog articles, meaning this is where I keep track of what articles I'm writing and what status they have.
You can read more on my writing process here
You might be wondering, ok, but why do we need an API connection? Let's go back to what Notion offers us, and that includes databases!
Meaning Notion can be a super easy database source for any application we wish to make.
Getting a Notion API key
Before we get started, you must be an admin or create a new workspace yourself.
Once you established that, head over to https://www.notion.com/my-integrations and click the "+ New integration" button.
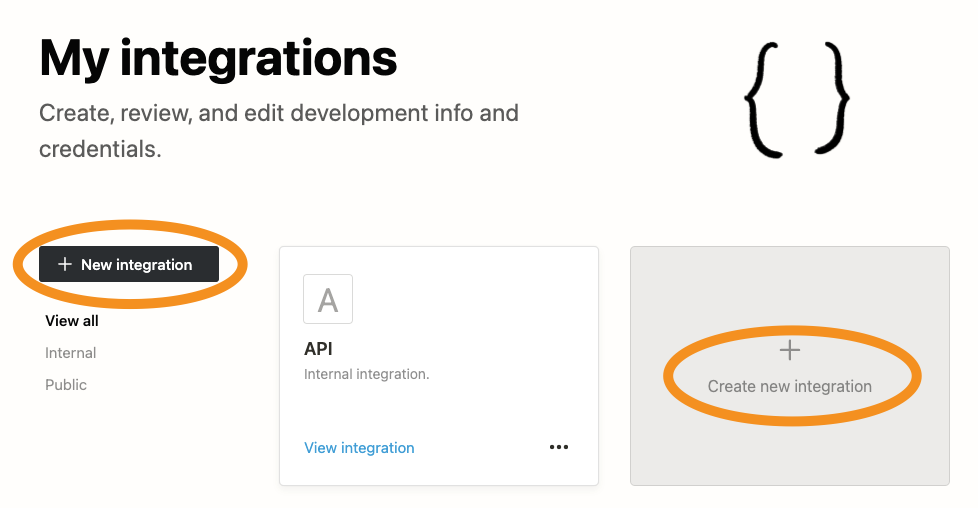
Give this new integration a name. As you can see above, I called one "API". Also, select the workspace it's associated too.
On the last screen, you will get an "Internal Integration Token" this is what we will be using to query our Notion database. So copy this to a safe location for now.
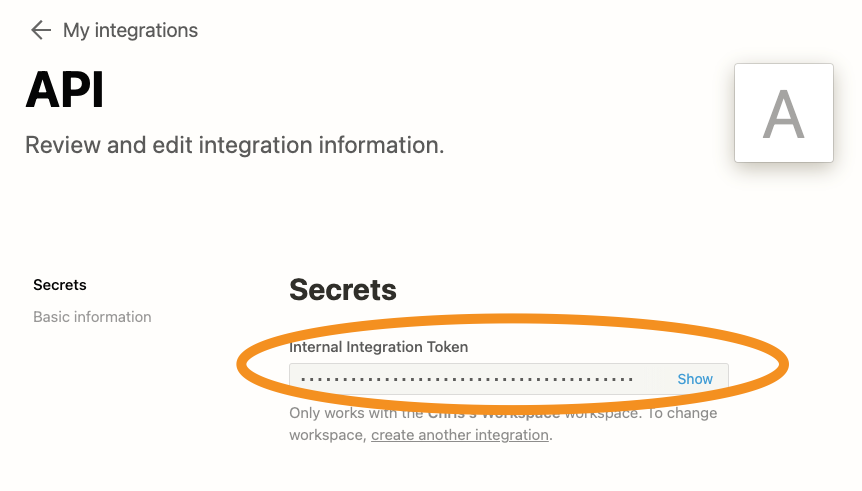
Make database available for integration
By default, our databases won't be available for this integration. We have to give access to it explicitly.
This will make the current page available for our integration. The next thing we need is the ID of this database.
Press the three dots on your table and click the "Copy link" button.
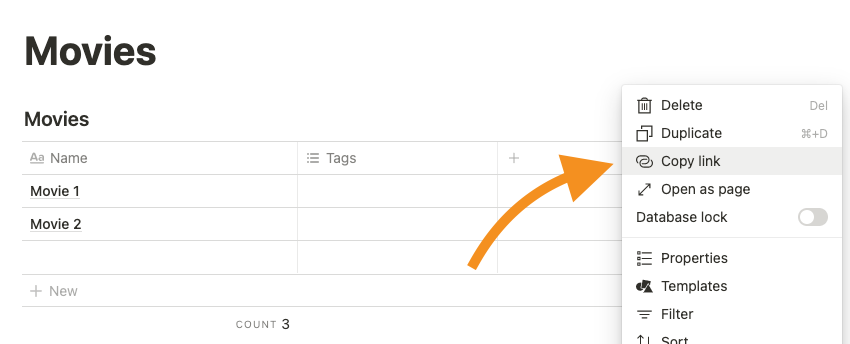
This will give you a URL that will look similar to this:
https://www.notion.so/6d6703dae1864e8ba381a9430447fc29?v=6b4520e686ef4b88a5f16b0ee54ffd5dWe need the part before the ? so in our case: 6d6703dae1864e8ba381a9430447fc29.
Query the Notion database
By now, we have everything that we need to test out the Notion API.
- An Notion integration
- Notion API Key
- Database in Notion (Table)
- Integration has access to our table
- Table ID
Head over to your favorite API Client.
First, let's query the database and get the structure of our table.
As the URL, use the following setup:
https://api.notion.com/v1/databases/6d6703dae1864e8ba381a9430447fc29You will need to change the ID to the table ID we just got.
Then head over to the Auth section and choose to use a Bearer Token.
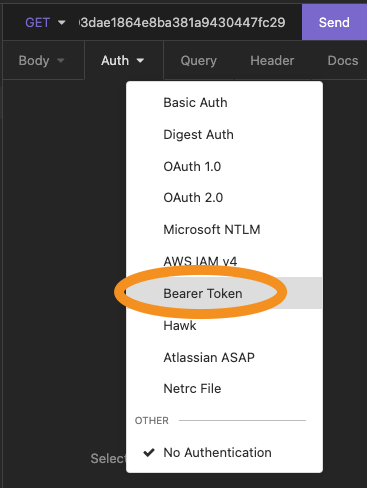
Then there is one last thing we need to add: a Notion-Version header. Head over to the header section of your API client and add one like this:
Notion-Version: 2021-05-13
Now hit the send button and see what we'll get in return.
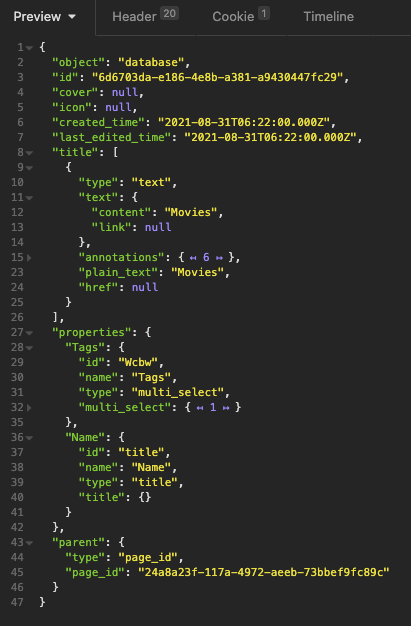
As you can see, this includes a database object and the fields that belong to it under the properties section.
In our case, there are two so far beings:
- Tags
- Name
Of course, we also want to query for the actual data.
For that, we need to make a POST request to the same URL, but append /query at the end like this:
https://api.notion.com/v1/databases/6d6703dae1864e8ba381a9430447fc29/query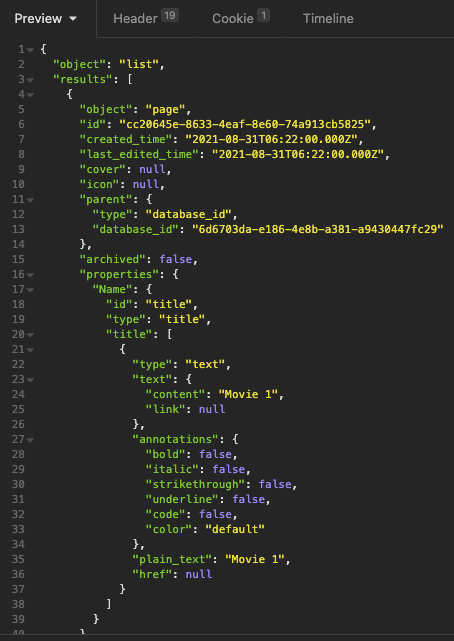
Here you can see we get multiple results, each containing numerous properties. In the screenshot, you can see one of these properties having the same properties.
And that's as far as we go today. We can create a new Notion integration and query a database table in Notion.
We'll go on and create a real-world example in another article.
Thank you for reading, and let's connect!
Thank you for reading my blog. Feel free to subscribe to my email newsletter and connect on Facebook or Twitter
