We now have a Node API that can query our Notion database results. We'll explore how we can show these results in the front end!
This is a series on building a Node powered Notion API:
- Part 1: Getting started with the Notion API
- Part 2. Configure Tailwind JIT for a node express app
- Part 3: Node express query Notion database
- Part 4: Node express showing Notion results in the front end You are here 💖
- Part 5: Updating a Notion page through a node website
- Part 6: Creating a Notion page through a Node express app
Query our Node API from the frontend
So at this stage, we can query our Node API by visiting the /movies endpoint. However, we want to query this from our front end and work with this data.
Let's modify our HTML, include the JavaScript link, and create a placeholder div where we can render our data.
<!DOCTYPE html>
<html lang="en">
  <head>
    <meta charset="UTF-8" />
    <meta http-equiv="X-UA-Compatible" content="IE=edge" />
    <meta name="viewport" content="width=device-width, initial-scale=1.0" />
    <title>Notion API Test</title>
    <link rel="stylesheet" href="styles/style.css" />
  </head>
  <body>
    <div class="flex flex-wrap" id="movie-container"></div>
    <script type="module" src="./script.js"></script>
  </body>
</html>
Let's go ahead and create the script.js file in your public folder.
We will add the logic in querying our database and showing the results in our HTML file.
The very first thing we should do is define our movie container div. That will be the element we will add our movies into.
const movieContainer = document.getElementById('movie-container');Then let's create a function that will fetch all the movies from our Node database.
const getMovies = async () => {
  const rest = await fetch('http://localhost:8000/movies');
  const data = await rest.json();
  return data;
};
Then let's create a function to show the movies.
const showMovies = async () => {
  const movies = await getMovies();

  movies.forEach((movie) => {
    console.log(movie);
  });
};

showMovies();
As you can see, this function is also the one invoked. What happens is it will get our movies and await the results.
Once the results are there, it will loop over each movie and log it in our console.
Each movie object looks like this:
{
  banner: "https://upload.wikimedia.org/wikipedia/en/9/91/Shershaah_film_poster.jpg"
  id: "7405664d-d341-4ecd-9057-ca083a83a71b"
  name: "Shershaah"
  tags: ["drama", "action", "biography"]
  watched: false
}
Adding movies to our frontend
Then it's time to add a div for each of our movies. From our Node express Tailwind example, you might remember that we already have a layout we can use.
The HTML for it looks like this:
<div class="w-1/4 p-4">
  <div class="relative pb-[200%]">
    <img
      class="absolute object-cover w-full h-full rounded-lg shadow-md"
      src="https://m.media-amazon.com/images/M/MV5BYzE5MjY1ZDgtMTkyNC00MTMyLThhMjAtZGI5OTE1NzFlZGJjXkEyXkFqcGdeQXVyNjU0OTQ0OTY@._V1_FMjpg_UX1000_.jpg"
    />
  </div>
  <div class="relative z-10 px-4 -mt-8">
    <div class="p-6 bg-white rounded-lg shadow-xl">
      <h2>Deadpool</h2>
      <span
        class="inline-block px-2 text-xs font-semibold tracking-wide text-blue-800 uppercase bg-blue-200 rounded-full "
        >New</span
      >
    </div>
  </div>
</div>
We need to use the JavaScript createElement method.
I like to work top-down, so let's start with the wrapping div. As you can see, it's a plain div with the classes: w-1/4 p-4.
const movieDiv = document.createElement('div');
movieDiv.className = 'w-1/4 p-4';

movieContainer.appendChild(movieDiv);
The above code will create a div element with those class names and append it to our wrapping div. However, since there is no content yet, we can only see this in the HTML structure.

The next element we have is the wrapping div around the image, so let's create that one.
const imageDiv = document.createElement('div');
imageDiv.className = 'relative pb-[200%]';

movieDiv.appendChild(imageDiv);
Here we create the image div and append it to the movie div since it's a child of this element.
The next element we need is the actual image. Let's go ahead and create that.
const image = document.createElement('img');
image.src = movie.banner;
image.alt = movie.name;
image.className = 'absolute object-cover w-full h-full rounded-lg shadow-md';

imageDiv.appendChild(image);
As you can see, this is the first part where we use the dynamic data to set the src of the image and the alt text.
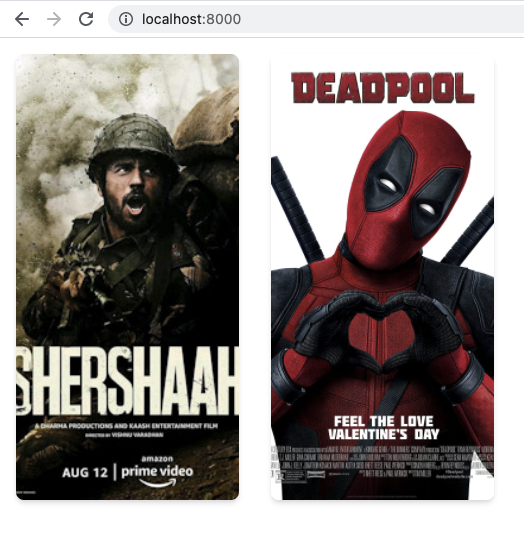
By now, we should see something in our front end.

Now let's move to the div below the image that holds our text elements and tags. There are two main wrapping divs here, one as a container and one for the card styling.
const textContainerDiv = document.createElement('div');
textContainerDiv.className = 'relative z-10 px-4 -mt-8';

const textCardDiv = document.createElement('div');
textCardDiv.className = 'p-6 bg-white rounded-lg shadow-xl';

textContainerDiv.appendChild(textCardDiv);
movieDiv.appendChild(textContainerDiv);
When playing with these appendChild types, you might get overwhelmed about where to place each item. It helps a lot by naming them correctly, so you remember what each element does.
Then inside the text card, we have a title and some tags. Let's do the title first.
const title = document.createElement('h2');
title.appendChild(document.createTextNode(movie.name));

textCardDiv.appendChild(title);
As you can see, for the h1 element, we use a text node element, which is the advised way to create such an element.
Then it's time to move to our tags, the last thing to make our card. We want to loop over each tag and create a span element for it.
movie.tags.forEach((tag) => {
  const tagSpan = document.createElement('span');
  tagSpan.className =
    'inline-block px-2 mr-2 text-xs font-semibold tracking-wide text-blue-800 uppercase bg-blue-200 rounded-full';
  tagSpan.appendChild(document.createTextNode(tag));
  textCardDiv.appendChild(tagSpan);
});
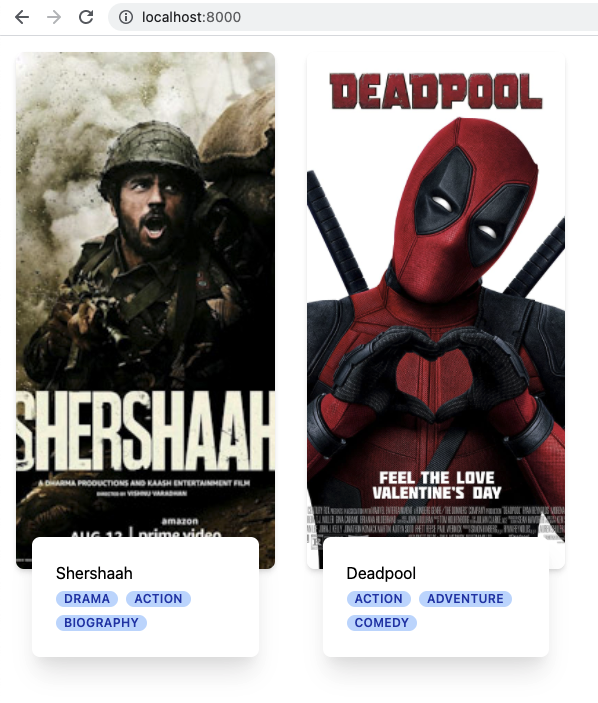
And with that, we have our complete code setup!
Go ahead and add a movie in your Notion document 👀

There is only one small thing we need to do. Since we moved our class names to a JavaScript file, we have to notify Tailwind to purge our JS files.
Open the tailwind.config.js file and add the following purge:
purge: ['./public/*.html', './public/*.js'],If you want to view the complete code again, I've uploaded it to the following GitHub branch.
Thank you for reading, and let's connect!
Thank you for reading my blog. Feel free to subscribe to my email newsletter and connect on Facebook or Twitter