So far, we have had a look at static loading data, and loading data from our database, but another widely used method is loading from an external API.
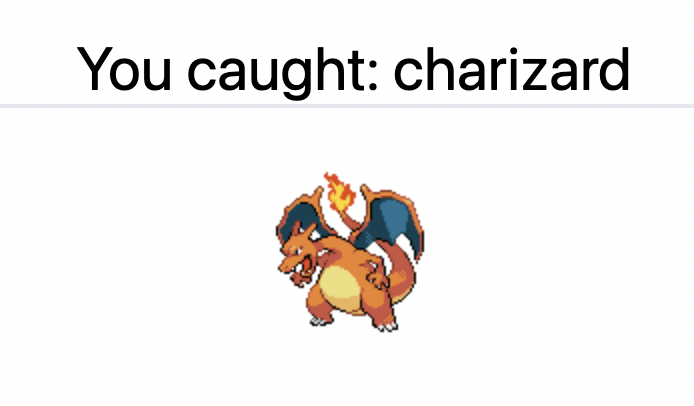
In our case, we will query the Pokémon API to retrieve a list of all Pokémon. We will catch it and see the relevant picture by clicking on one.
I'll be using the project we set up so far. If you want to code with me, start with this GitHub repo.
Creating the Pokémon API calls
The first thing we want to do is add a new server file. In our case, this file will be pretty straightforward, but we might want to re-use some of these calls later.
Create the pokemon.server.ts file inside your app/models directory.
Here we will need two files, one to retrieve the main list of all Pokémon and one to retrieve the details for a specific Pokémon based on its name.
The first one is the easiest:
export async function getPokemons() {
  const res = await fetch(
    'https://pokeapi.co/api/v2/pokemon?limit=100000&offset=0'
  ).then((res) => res.json());

  return res.results;
}
We could technically also return the await fetch hook, but since we are only interested in the results, we directly return those.
Note: The Pokemon API returns a pagination result. That is why we need to access
res.resultshere.
The second part is to retrieve the Pokémon by its name.
export async function getPokemon(name: string | undefined) {
  const res = await fetch(`https://pokeapi.co/api/v2/pokemon/${name}`).then(
    (res) => res.json()
  );

  return {
    name: name,
    img: res.sprites.front_default,
  };
}
Here we apply the same trick of only returning what we need. You can add as many fields as you like from the response object.
Creating the Pokémon overview list
Now that we have access to the data, we can start using it.
Create a Pokemon folder inside your app/routes directory.
And inside this create the index.tsx file, which will be our overview file.
Then we can leverage TypeScript to add the loader in a type save way.
import { json } from "@remix-run/node";
import { Link, useLoaderData } from "@remix-run/react";
import { getPokemons } from "~/models/pokemon.server";

type LoaderData = {
  data: Awaited<ReturnType<typeof getPokemons>>;
};

export const loader = async () => {
  return json<LoaderData>({
    data: await getPokemons(),
  });
};

export default function Posts() {
  const { data } = useLoaderData() as LoaderData;
  return (
    <main className="mx-auto max-w-4xl">
      <h1 className="my-6 border-b-2 text-center text-3xl">
        Which Pokémon do you want to catch?</h1>
      <ul className='mx-auto text-center'>
        {data.map((pokemon) => (
          <li key={pokemon.name}>
            <Link
              to={pokemon.name}
              className="text-blue-600 underline"
            >
              {pokemon.name}
            </Link>
          </li>
        ))}
      </ul>
    </main>
  );
}
The main parts to look out for are the actual loader function and the call to this loader function inside the component.
This will query our newly created server file and ask for all the Pokémon.
We then render them in a list, resulting in the following:

Also, note that we use the link component to link to each Pokemon based on its name. We will use this information in the next part.
Rendering single Pokémon pages
As we read above, we link to each Pokemon, and it will generate a URL like so: /pokemon/${name}.
By leveraging this, we can add $name.tsx file in our pokemon directory.
Note that the $name is the param you want to read later on.
The setup of this file is very similar to the overview page, but it uses a different function.
import { json, LoaderFunction } from "@remix-run/node";
import { useLoaderData } from "@remix-run/react";
import { getPokemon } from "~/models/pokemon.server";

type LoaderData = {
  pokemon: Awaited<ReturnType<typeof getPokemon>>;
};

export const loader: LoaderFunction = async ({params,}) => {
  return json({
    pokemon: await getPokemon(params.name),
  });
};

export default function PostSlug() {
  const { pokemon } = useLoaderData() as LoaderData;
  return (
    <main className="mx-auto max-w-4xl">
      <h1 className="my-6 border-b-2 text-center text-3xl">
        You caught: {pokemon.name}
      </h1>
      <img className='mx-auto' src={pokemon.img} />
    </main>
  );
}
And now, when we click on our Pokémon, we get the following page.

This is the more detailed way of loading data from an external API. You could always opt to use the endpoints directly in your files loader functions. However, by extracting them, you are set up for the future.
You can find the complete code on GitHub.
Thank you for reading, and let's connect!
Thank you for reading my blog. Feel free to subscribe to my email newsletter and connect on Facebook or Twitter

